Chapter 0 Getting Started
Learning Objectives
By completing this lab you will be able to:
- Understand the fundamentals of Cisco Kinetic Edge & Fog Processing Module (EFM) installation and configuration
- Build your own Kinetic EFM demo kit
- Demonstrate and explain the value of Kinetic EFM to your customer
Lab Environment
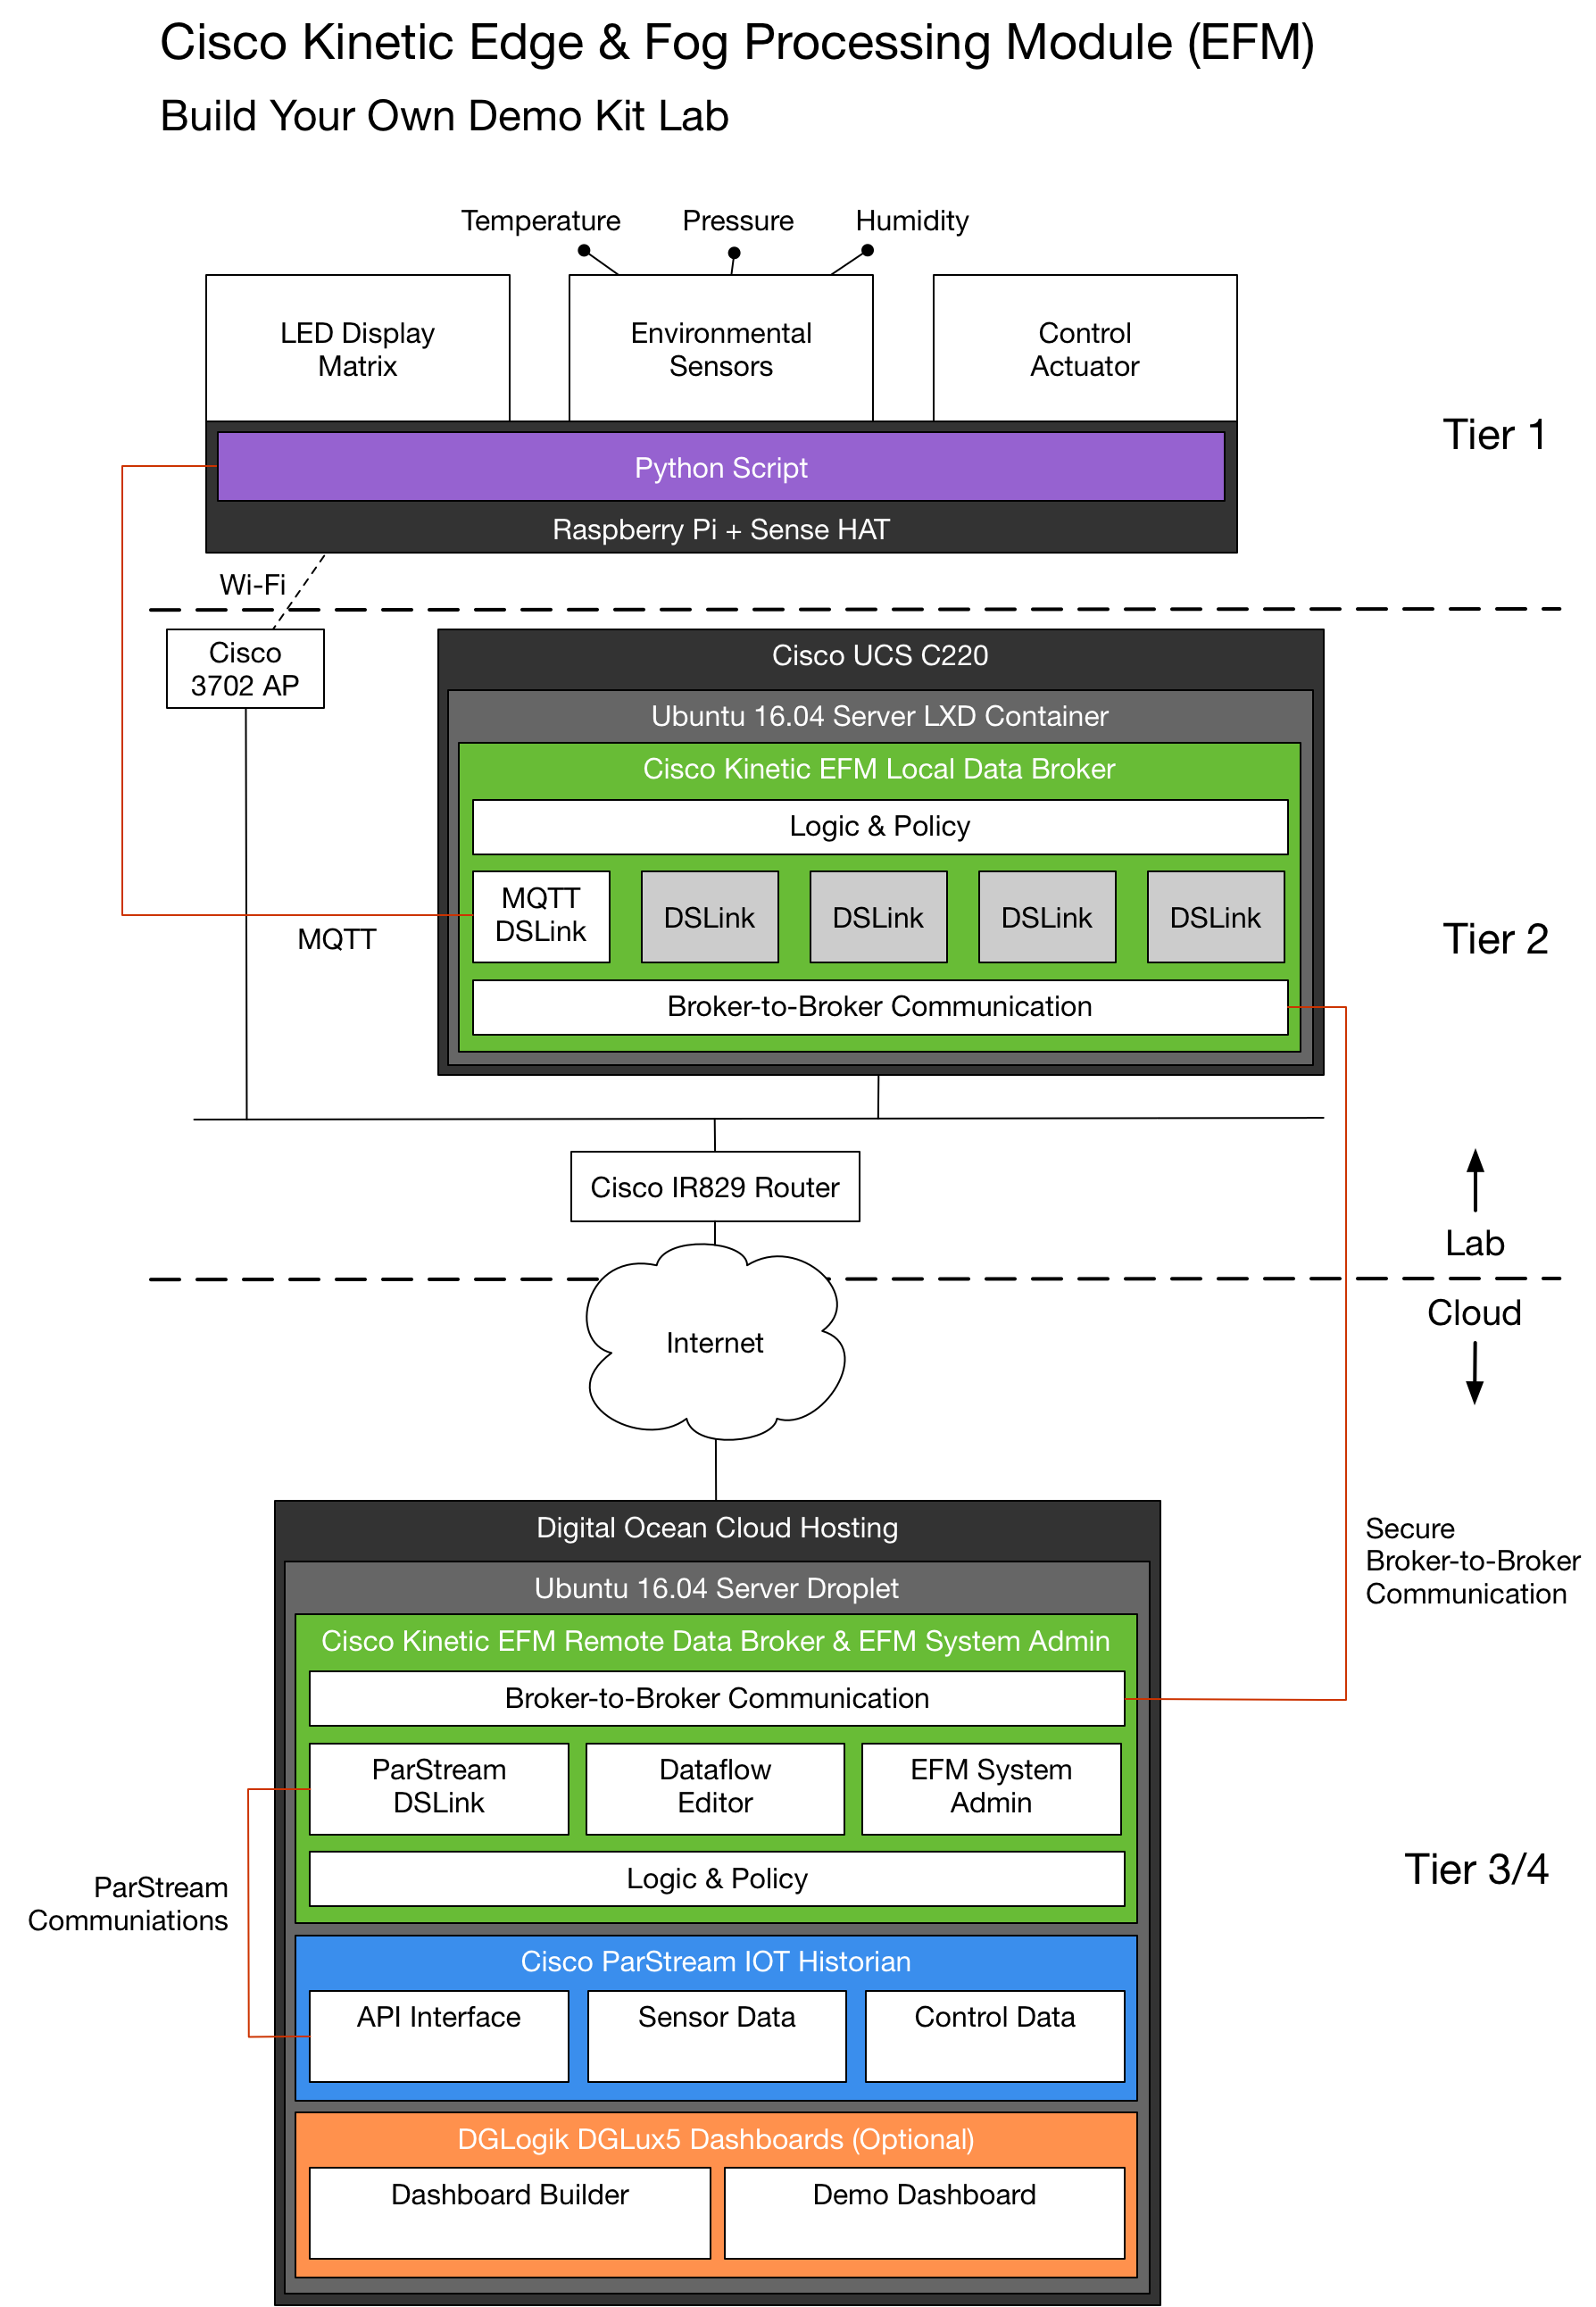
You will need a laptop with an SSH client and a web browser. All other lab components are provided. The following diagram shows the various lab hardware and software elements, and how they connect and communicate:
If any image in the lab is too small to read, right-click on the image in your browser and choose
Open Image in New Tab
The “thing” in this lab representing devices that exemplify our Internet of Things (IoT) is a Raspberry Pi with a Sense HAT module that has a variety of built-in capabilities. There is a Python script running on the Raspberry Pi connecting the various sensors, control actuator (joystick), and display to the MQTT server the local EFM broker is running.
All the local EFM brokers are running on a UCS C220 server loaded with Ubuntu and container-hosting software called LXD. Each EFM local broker container is allocated 2 vCPU, 2 GB RAM, and 20 GB of storage.
The local broker is only going to run the EFM components that would typically be found at the edge. This includes the EFM broker, and core system DSLinks. This is similar to the components used when EFM is running within IOx on the IR829 or IE4000. The micro-service hosting environment of IOx is very similar to LXD on Ubuntu.
All the remote EFM brokers are running on Ubuntu Digital Ocean droplets. Each EFM remote broker is allocated 4 vCPU, 8 GB RAM, and 160 GB of storage. The remote broker is going to run all EFM components.
Although the IR829 can also run EFM on top of IOx, in this lab it is only providing outbound Internet access for the EFM local brokers hosted on the UCS C220 to access the remote brokers hosted at Digital Ocean.
Access Information
The name and private IP address of your local broker is based on your station number.
Station 1 uses l-broker-01 and has IP 10.11.2.101
Station 2 uses l-broker-02 and has IP 10.11.2.102
...
Station 14 uses l-broker-14 and has IP 10.11.2.114
And so on. There are 20 stations.
The name scheme for your remote broker is almost identical: r-broker-01, r-broker-02, and so on. However, the IP address of your remote broker is a public IP that is allocated when Digital Ocean provisions the droplet. Since this happens a short time before the lab, the instructor will display a list of remote brokers and IP addresses. Find the name and public IP address associated with your station number and write it down.
You will need to connect to the local Wi-Fi to be able to SSH to your local broker and give it a “bootstrap” configuration to connect to the remote broker. Once that part of the setup procedure is complete you will be able to perform the rest of the lab with standard Internet access.
The lab Wi-Fi SSID is
efm-laband the password iskinetic123
Getting Help
Make sure you follow the chapters and configuration steps in the order they are written and not skip around. If there is a note directly after a step, make sure to read the note before following the instructions for that step as it usually has important information.
This is what a note looks like.
There is some troubleshooting information included so you can help yourself, and to help you learn more about Kinetic EFM and the lab environment. That said, don’t be afraid to ask the instructor for help if you get stuck. If you are reading this outside of an in-person lab session you can email the author here or reach out to matgibbs@cisco.com on Cisco Webex Teams or Jabber IM.
Good luck!